When a person explains to you what makes cryptocurrency unique from a traditional fiat currency system the individual will normally underline the concept of it representing a digital value. Cryptocurrencies shy away from tying themselves to physical constructs as a way to break away from the traditional fiat currencies found throughout the world. They were designed for everyone to no longer rely on using environmental resources in a world run by digital technologies.
However, not every cryptocurrency follows this ideology. Such as DigixDAO, a cryptocurrency where a single token equals a gram of gold. How does this work?
First off, if you look into the company they have two tokens: Digix Gold Tokens (DGX) and Digix DAO Tokens (DGD). Of the two, only a DGX token equals a single gram of gold. Many would come to the conclusion they’re only interested in investing in DGX tokens given this piece of knowledge. Don’t act too hasty.
The DGD token operates exactly as many would expect from a typical cryptocurrency as it runs on the DigixDAO blockchain and those who own it have a share in the software. DigixDAO have a fixed number of DGD available, 2,000,000, and the owners of those tokens receive a quarterly reward based on the total DGX collected through transaction fees. The owners receive their reward in the form of DGX tokens.
Also, the development team created a voting system for the DGD owners for the community to directly influence the direction DigixDAO goes. This way, the developers can hear feedback by all the community members directly influenced by any decision they would make and keep the community’s interests at the forefront.
Bottom line: DGX tokens equal gold whereas DGD remains a digital currency.
As of right now, you can only purchase the DGD outside of the blockchain. DigixDAO have announced they plan allow the public to start purchasing DGX tokens directly during the first quarter of 2018. Because of this, this article focuses on how to purchase DGD.
This brings you to your big question: how to purchase DGD tokens?
Surprisingly, you’ll have to go to through a few extra steps to acquiring the DGD tokens and adding them to your collection. One of the things you’ll have to do is purchase Bitcoin (BTC) or Ethereum (ETH). You’ll use those one of those tokens to exchange for DGD. This article will guide you through the entire process and make it a far easier task.
Before you can take you continue forward to owning DGD, you need to know what wallets work with the token. Here’s a small list of recommended wallets for you to pick from:
- MyEtherWallet
- MetaMask
- Mist
The wallets listed above stand out from one another and work on different formats.
MyEtherWallet acts as a safeguard for your information to access your funds, protecting the specific details on your computer. The wallet does not connect to the blockchain, meaning you have to protect your computer’s wellbeing as much as possible and ensure you keep the security of your desktop frequently updated. If you use this service, remain weary as hackers have a history of attacking the service and targeting accounts.
When you download this wallet you should review some tutorial videos about how to operate the interface. First time cryptocurrency users have had a history of finding MyEtherWallet’s interface easy to use and struggle in the beginning. Check out a few videos on YouTube to see if you can get ahold of the basics.
For those not interested in downloading their wallet, MetaMask may suit your needs as it works entirely from your browser. As of right now, the service only works with Chrome, Firefox, and Brave browsers.
This service was created to work well with newcomers as the development team wanted to build a wallet capable of getting used by those wanting jump into cryptocurrency. Also, because the wallet works as a browser extension the service protects users by having a blacklist of phishing websites designed to steal your wallet information from you. The service prevents you from proceeding to these websites.
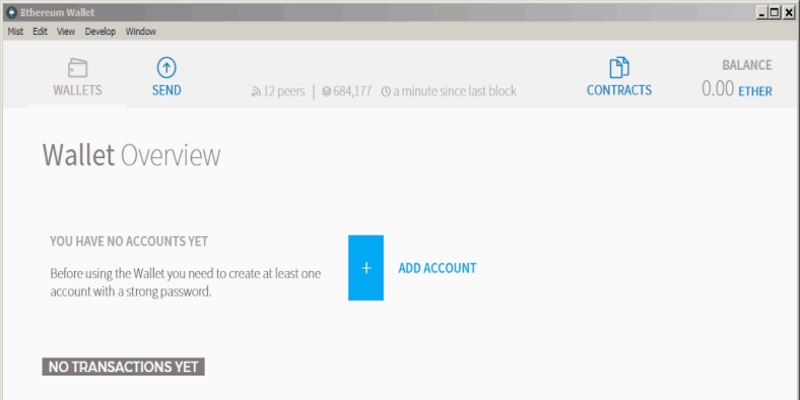
The final wallet, Mist, comes with a heavier price tag. This service directly connects to the Ethereum blockchain and requires every user to have enough room to store this information on their hard drive. The process of syncing the wallet with the blockchain can take quite a bit of time. The process can sometimes take such a large chunk of time, some users who have had it have claimed they lost money while using the application, however, it was only because their wallet had not properly synced to the blockchain.
Though these drawbacks may shy away those who have never handled a cryptocurrency before, this application is the official Ethereum wallet. This means the security of the wallet remains top notch and the security keys attached to your wallet stay in your control.

If none of the wallets listed on this article suit your liking, make sure you find a wallet that compatably works with ERC20 tokens, as DGD is listed as such. The website TokenMarket have a variety of wallets listed that should work.
Now that you’ve chosen the wallet you want to use, it’s time to start working towards getting your first DGD tokens!
Creating an Exchange Account
The first website you need to visit is one where you can exchange your fiat currency with either ETH or BTC. You can do this from a number of websites. Here’s a recommended list of choices for you to pick from:
- Coinbase
- Kraken
- Changelly
When you’ve arrived to your preferred websites, follow the steps to creating an account with them. During the process you will need to use an email and when you finish the website should send you a message requesting you verify that status of your account. Make sure you do this before moving on to the next step.
Because you’re transferring currency between multiple websites you should expect to pay a handful of fees for each transaction. For those interested in paying the lowest fees, create your first account on Coinbase as they provide a most cost effective choice for this that is detailed later on.
Purchasing ETH or BTC
Following the verification of your account you should now proceed and place a preferred payment method on it. Some exchange websites require your bank information, while others allow you to use a credit or debit card.
At this stage you’ll want to spend a little time doing some research about how much DGD you want to purchase during the final transaction. When you know this, start digging around the market to find out how much ETH or BTC you need. When you have the answer for both, see how much your fiat currency can purchase and determine the best choice to bring you closest to your final transaction. This answer changes on a daily basis.
When you’ve made your decisions and have a financial plan to acquire the amount of DGD you want to start with, proceed with purchasing your cryptocurrency of choice. Any exchange website takes a little bit of time to process this and you may have to refresh your browser several times to see your new currency sitting on your account.
Creating a Cryptocurrency Account and Transferring Funds
When you’ve confirmed the arrival of your new cryptocurrency on your first account, you’re ready to head on over to a new website where you can trade your cryptocurrencies with others. Here’s a list of recommended websites where you can do this:
- Binance
- Cryptopia
- Coinspot
After you’ve made your choice, go ahead and start making a new account on there. The steps should feel similar to the ones you did while on the first exchange website and to make things easier it’s recommended you use the same email address you already used. This make keeping track of all of yours accounts easier. Following the set up of your account, respond the verification email the cryptocurrency exchange website sends your email prior to continuing forward to the next step.
If you created an account on Coinbase to not have to pay the higher transfer fees, you will want to create an account with Binance of the choices available to you. Next, head on over to Gdax.com and locate the section to ‘log in’ to your account. You should use the account information you used on Coinbase here, and you can do this because Coinbase owns Gdax. Once you’ve successfully logged in transfer your cryptocurrency funds to your Gdax account and use the Gdax account information during the next step, not your Coinbase information.
Upload ETH or BTC To Your New Account
You should now have two accounts to keep track of. One of these have a balance of ETH or BTC sitting on it, while the other contains nothing. You should transfer those funds over to the account on the cryptocurrency exchange website.
To do this, locate the public access key of your second account and have that at the ready. Return to the account with your cryptocurrency balance and find the ‘transfer’ icon, type in the public access key, and transfer all of your funds over. Much like the first transaction you were in, this process can take a few minutes to properly complete. You may want to refresh your browser a few times to make sure your first account reflects no cryptocurrency on it, while your second account shows a new balance.
Exchanging for DGD
Moving forward you no longer have to worry about the first account, as the second one you created should have all of your ETH or BTC in its balance. Time to trade it in for DGD!
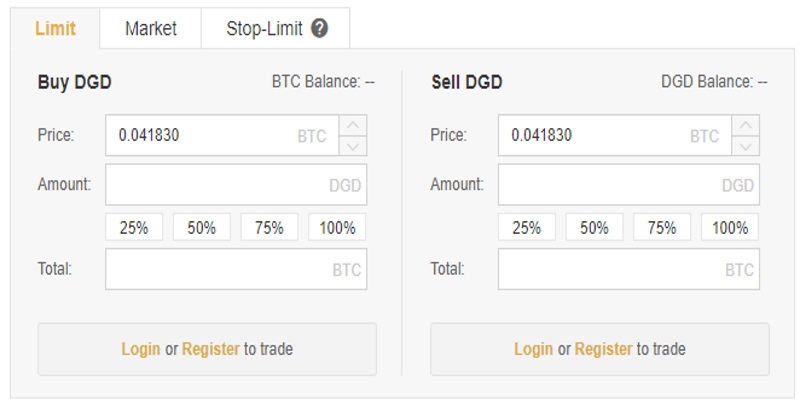
On the cryptocurrency exchange website go the market menu and locate the DGD section. Click on the icon and you should arrive at a page where you can read detailed information about DGD’s current status in the market. Locate the ‘buy’ option and you’ll get taken to a transaction page where you can trade in your ETH or BTC for DGD. If you took steps to do research at the beginning you should already know how much DGD you can purchase for the amount of ETH or BTC you bought. Type in the full amount you have on your account and confirm the transaction.
This transaction should take a little bit of time but by the end you should see your first cryptocurrency purchase replaced with DGD tokens.

Deposit DGD Into Your Wallet
You’ve completed the DGD transaction but you still have one more thing left to do!
The final thing you need to do is send those newly purchased DGD tokens over to the wallet you picked during the beginning. Use your wallet’s public access key on your cryptocurrency exchange account and send all of your tokens over.
Any time you complete a cryptocurrency transaction, make sure you send them over to a wallet outside of the exchange website as the last step. Many cryptocurrency investors do this to protect all of their funds because if they leave anything on an exchange account, the website could become compromised and they may lose all of the funds they purchased.
Congratulations! You’re now the proud owner of DGD and you should have it sitting securely in your wallet. If you plan to purchased more DGD in the future, the entire process should take far less time as you no longer have to create accounts or verify email messages. Though the time it takes for transactions to complete will remain the same. Each time you plan to make a purchase, make sure you devote some time to research the current state of the market to get the most out of your investments.


